Sketch is a well-noted name in the web design industry which is rising the number of its supporters by regularly attracting the Adobe Photoshop users. This is why the market critics consider this graphical app as the perfect alternative of Photoshop. Being a very nicely structured app, this is changing the way of designing the websites.
If go with the figure of Sketch vs Photoshop, the number of Sketch users is uplifting day by day and this is because the multifarious tricks it provides. It serves great qualities to effectively execute the entire designing process. The clear image of this tool indicates why Sketch is better and majorly used in the web designing industry! This post rounds up some practically proven tips helpful to strengthen the overall workflow of a website development process.
Well, Now Discuss About Sketch in Brief!
In the year 2014, the official Sketch community has released the two versions Sketch 2 and 3. And after that update, the graph of Photoshop users started decreasing because their users/supporters were switching to Sketch’s latest version. Their newest versions bring simplicity which is intuitive without any argument and more powerful than Photoshop. Thus, their vector programs are competent enough than illustrator. Regardless of bitmap editing tool, this graphical designing tool holds pixel preview feature and lets you design the icons and interfaces.
Here Are The Must Know Sketch Features To Save Your Time:
1. Exporting

Another unavoidable feature “Exporting” comes with Sketch.
- • Go to File
- • Export as well as draw like multifarious slices
You may further export your designed file of @1x as @2x.
With awesome slicing control, Sketch renders a lot of facilities to manage the design as per the requirements.
For the best slicing control
- • Click menu item file
- • Add slice
- • Choose the recently build layer
- • Click the item that is exactly as same as the size of selection
2. Rounded Corners Ascendancy
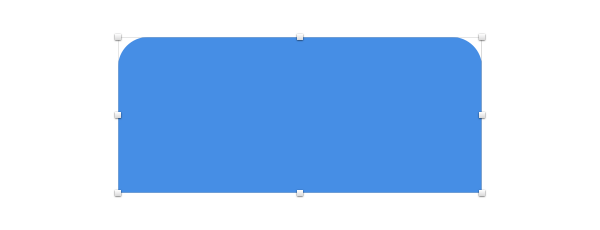
Do you remember rounded rectangle building feature which came in Photoshop the years ago to perform this action and get the result as unique as you desire for! Their thorough execution was little onerous due to absenteeism of rounded rectangle preset. But all thanks to Sketch which carried out this feature with painless steps to implement.
And now what occurs if you go with Photoshop to make the corners rounded, then it is crucial to operating with Convert Point Tool afterwards only you will have the option to pick one point out of the available. Place the selected one cautiously and remove additional points. The same thing repeats for other rounded corner creation.
On the contrary, Sketch makes it simpler letting an option to click Edit, where you are authorized to pick the points that you desire to be acicular and then click that acicular icon.
3. Symbols
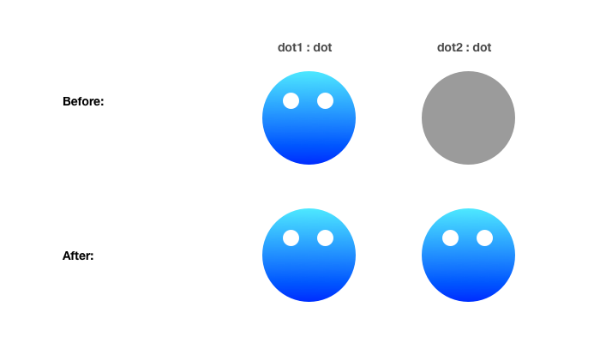
This is an outstanding plugin released by Tisho Georgiev called Symbols that provides utmost strength to mimic the smart objects. If we talk about these smart objects, then you’ll be surprised to know that these symbols let the designers hold different instances of single object in one document. After editing in any smart object and pressing CMD+E, all the changes will appear across the instances.
4. Templates
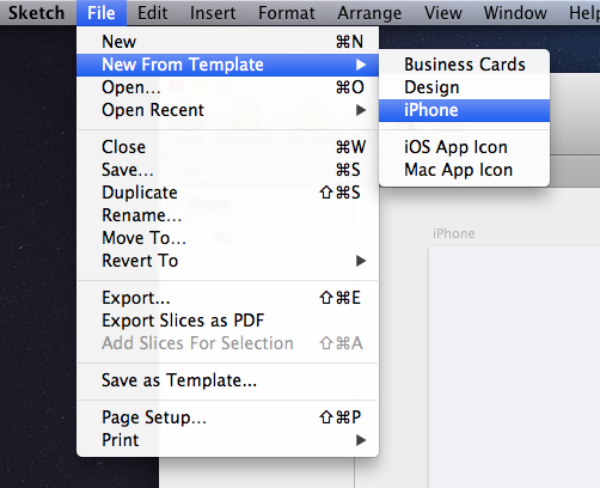
The user can easily create a new file using template incorporated with Sketch. For this,
- • Go to menu item file
- • Choose new from the template
You may also save your current file just like a template which is being done to start every project from the present stage. Click on File -> Save the file as the template. Doing all this is beneficial of iOS.
5. Distribute Spacing
Want to encompass a chain of elements in your design? Or do you need spacing between these bunches? Doing both tasks is no longer required manually because Sketch carries an interesting feature called Distribute Spacing to make it possible. Now it depends upon you, whether you like to disseminate them on the FLY or just want the management of spacing, and a number of columns & rows via the setting.
6. Simple Grids
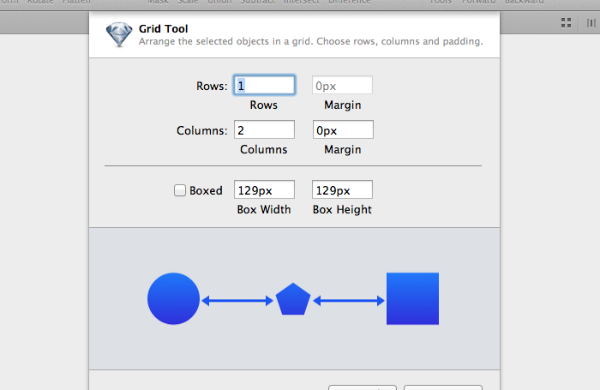
Although the grid creation process is smooth, but you may execute this simply via Sketch because it incorporates an easy-to-use feature named “Create Grid”. Go to the sub-toolbar to click four boxes that are found on the upper right corner of the image, this is to unveil the pop up menu. Here, the user owns the authority to define the number of columns and rows as well as arrange them into the object in your desired way. Want to define areas encircled with every object and spacing into them? Just choose the Boxed option for this. This is one of the best features that has convinced many renowned organizations to use Sketch for developing the website.
7. Linked Styles
Bolstering you with a feature, Sketch boosts your capabilities to create the linked style of your desire to the text in a pretty cool manner which is indeed laudable for the designers. Once you link the style in the text, future alternation will automatically be performed to the whole text sharing that specific style. This design tool even also needs from you to apply these changes to the pages’ feature. In this way, you can have the well-structured & shared footer & header along with related design elements like shapes.
8.Color Picker
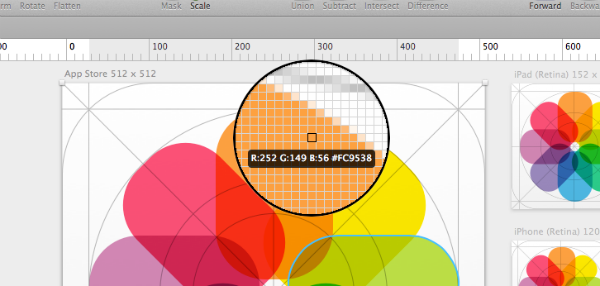
An effective color picker feature allows picking random color appeared anywhere on the screen. For this, you need to press CTRL+C and the Sketch loupe will open to aid you to select the color you wish for. A really simple and prolific feature.
9. Artboard Presets
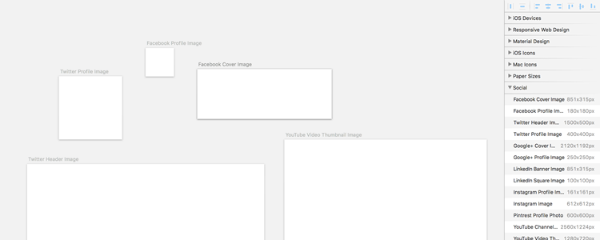
By default, Sketch provides infinite canvas that are fruitful to take advantage of Artboard presets. By clicking on Artboard button that comes under the toolbar, you receive an option to choose the presets directly from sub-toolbar. The available presets let people organize their designing work via predefined dimension. There is no need to remember the size of tons of favicons nowadays if using artboards catered by Sketch.
10. Pixel Perfection
Adjust the position of pixels in your design with the feature Pixel Perfection provided by Sketch app.
This feature should be implemented after icon import, but make sure the round up of the nearest pixel edge to confirm the perfect pixel precision. This painless approach can be easily done using advanced pixel checker tools. One such popular and reliable tool is CSSPrecise that helps you achieve the sharp outcomes exact to the needs.
11. Smart Guides
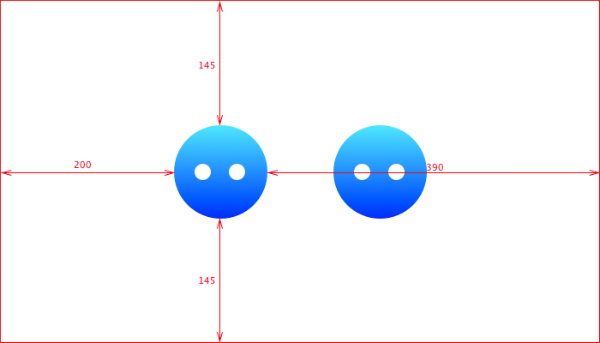
Sketch graphical application supports keyboard shortcuts, and Smart Guides is one of them. The Smart Guides appears after attaining an object and pressing ALT. It, furthermore, highlights the distance among document edge and the picked object. Suppose, you want to find out the total distance between the selected and another object, then the process is simple. For this, just hover over the another object which is desired for checking the distance, remaining task to check the distance will adjust automatically by the Smart Guides.
12. Shortcuts

An array of shortcuts you’ll find here in Sketch that are lucrative to use and create the shortcuts through OS X system preferences.
13. Control Style As Default

There is a complaint which is pretty common in almost design applications that why default properties urgently need modifications. See in Photoshop where default global angle & drop shadow properties have never been quintessential but Sketch overcomes this need. The default Grey border and color come with all essential shapes to bolster you create what you need.
14. CSS Style
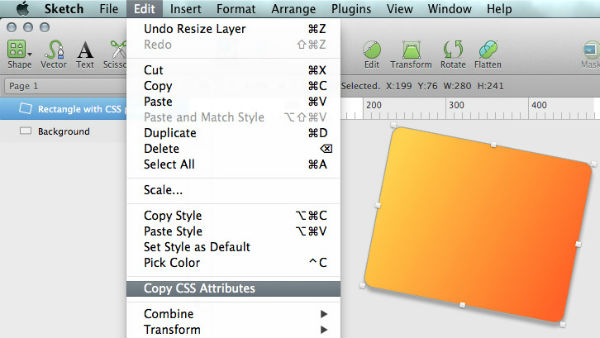
Although this is not a gleaming feature for the designers that you generally expect from Sketch, but this contains color codes and gradients to help at least. Honestly speaking that it is a bit painful to markup the positions, HEX and RGBA manually. That happens generally when Copy CSS appears in handy.
15. Masking & Alpha Masking
The process of layer masking is cinch via Sketch as it provides unique ways to handle it acutely. Here, any of the layers can be served like a mask to all same level of sub-folders, layers, and folders. This works as a potent solution, so keep tabs on the exemplary elements and no matter whether or not these are hidden. Isolating masks is also another fortified way. Thus, as you feel comfortable, sit relaxed and then find the same with little more adeptness in spite of including layer mask to Photoshop. Furthermore, it gives the option to edit the masking without any hassle.
16. Text On Path
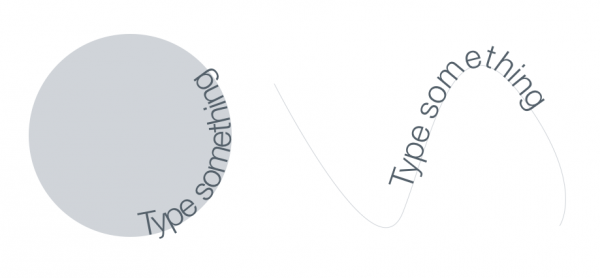
Many of us have been impressed especially how efficiently it works. Just simply create a shape or path by managing the subsequent text layer into Text/Edit on Path. In this way, your text will marvelously transform into the shape of your defined path. This is a bit knotty to use; hence, it is recommended to use it carefully.
17. Slice Addition
This feature is almost similar to the Photoshop Slice feature based on New Layer excepting a few options that allow you to select manifold layers as well as build the slices that are dependent on dimensions. The integrated export option in Sketch is undoubtedly fabulous for exporting and creating assets.
Sum Up!
Take the advantage of all the mentioned Sketch features to improve the overall workflow. All these extensions and features defined thoroughly in the form of tips will let you do great work. You may also give us suggestion for further enhancement using the below-mentioned comment box.